A drive belt that has been correctly specified, correctly sourced, and correctly routed can still fail prematurely if the final step is rushed. The final step is the install itself, and across UAE workshops the difference between a belt that runs cleanly for its full service life and one that returns to the bay within months almost always comes down to PK belt installation technique rather than the belt itself. The component is inexpensive. The labour, the comeback, and the reputational damage from a belt that squeals or sheds ribs three weeks after a service are not.
This guide is written for the people who actually do the work: workshop technicians, lead mechanics, mobile service operators, and serious DIY car owners working in their own garages across Dubai, Sharjah, Abu Dhabi, and the wider GCC. If you are looking for a reliable local source of automotive drive belts manufactured to international standards, Universal Rubber Belt Manufacturing produces the full PK range from its Dubai factory, and the wider trade catalogue is also available at universalbelt.ae. The aim of this article is to turn the belt swap from a quick job that sometimes goes wrong into a structured, repeatable procedure that gets it right every time.
The principles below apply to every modern serpentine drive belt across petrol and diesel passenger vehicles, light commercials, and most SUVs in the UAE parc.
Why PK Belt Installation Quality Matters More Than People Think
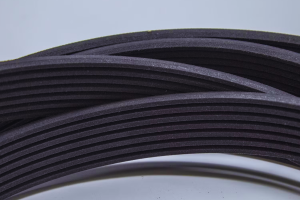
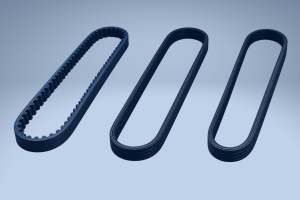
The PK belt — the multi-rib polyurethane-jacketed drive belt found on virtually every modern passenger vehicle — turns engine rotation into accessory power. It runs the alternator, the water pump, the power steering pump on hydraulic systems, and the air conditioning compressor. Every one of those components depends on the belt sitting in its pulleys with the correct tension, the correct alignment, and the correct routing. Get any of those three wrong, and accelerated wear begins from the moment the engine first starts.
Sloppy PK belt installation typically shows up in one of four ways. The belt squeals at idle or under AC compressor load. The belt walks off the pulley train within the first few hundred kilometres. The belt sheds ribs and starts to fray along an edge. Or — most expensive of all — a downstream accessory bearing begins to fail because the belt has been running misaligned, transferring side-load into the alternator or water pump shaft.
None of these failure modes are belt manufacturing defects. They are installation defects, and they are entirely preventable.
The other reason this work deserves dedicated attention is throughput. A workshop that has reduced its average belt job time by twenty minutes, eliminated callbacks, and built confidence in the technician handling the work has unlocked real economic value. Belt jobs are not glamorous, but they are common, and the cumulative impact of doing them well shows up clearly in monthly workshop margins.
Treat the procedure as a craft worth getting right rather than a quick swap that anyone can do in a corner of the bay.
Tools and Preparation for PK Belt Installation
Before any belt fitment begins, the bay should have everything needed within arm’s reach. Pausing mid-job to fetch a tool is one of the most common reasons routing errors creep in — the technician’s attention drifts, the belt diagram gets misread, and the belt ends up running over the wrong idler.
The basic toolkit for any modern serpentine belt job includes:
- The correct serpentine belt tool — a long-handled ratchet with a fitting that matches the tensioner pulley. On most modern engines this is a 3/8″ square drive, a 15mm or 17mm hex, or a manufacturer-specific spline. A purpose-made serpentine belt tool kit covers virtually every modern vehicle and pays for itself within a few jobs.
- A printed or screen-shot copy of the belt routing diagram for the specific vehicle and engine, not a generic one. Routing diagrams differ between facelift years even within the same model.
- A digital camera or phone to photograph the existing belt routing before removing the old belt. This is the single best protection against routing errors during reassembly.
- A torque wrench if any tensioner bolts or accessory mounts are being disturbed. Tensioner pivot bolts and water pump pulley bolts are not items where “tight enough” is good enough.
- Inspection light or head torch for the lower routing path, which is rarely well lit even with the bonnet open.
- Pulley alignment tool or straight edge for any installation where an aftermarket pulley or accessory has been changed alongside the belt.
- Clean shop rags and brake cleaner for wiping pulley grooves before the new belt seats — any oil film or rubber dust accelerates slip and squeal.
Preparation also means inspecting the rest of the drive system before any new belt goes near it. A worn tensioner spring, a seized idler pulley, or a leaking water pump weep hole will destroy a fresh belt in days. Belt replacement should never be a stand-alone job on a vehicle that has not been inspected for adjacent component condition first.
A quick inspection checklist for the surrounding components includes:
- Tensioner pulley face condition — any glazing, polishing, or rubber transfer onto the pulley face is a flag.
- Tensioner arm spring tension and damping — a hand check through the full travel range surfaces most problems.
- Idler pulley bearing condition — listen and feel for roughness, side-play, or any whine.
- Crankshaft pulley face and harmonic damper condition — a delaminated harmonic damper will destroy any new belt.
- Front engine seal condition — any oil weep onto the belt path is an automatic flag for further investigation.
- Coolant weep hole on the water pump — a visible stain is the early warning of an internal seal failure.
If anything in the inspection looks questionable, that is the conversation to have with the customer before fitting the new belt — not after the belt has come back into the bay covered in coolant.
Step-by-Step PK Belt Installation Procedure
Every workshop has its own house style, but the underlying sequence of a clean fitment is largely consistent across vehicle makes. The steps below are a structured outline that can be adapted to whichever specific engine layout is on the lift.
Step 1 — Photograph the existing belt routing. Even if the belt routing diagram is to hand, a clear photo of the original belt path from two angles is reference data that costs nothing and saves embarrassment later.
Step 2 — Release tension on the existing belt. Locate the automatic tensioner pulley, fit the correct serpentine belt tool, and rotate the tensioner against its spring to slacken the belt. The direction varies — many vehicles release with a clockwise pull from below, but always verify against the routing diagram.
Step 3 — Remove the old belt. Slip the belt off the alternator or air conditioning compressor pulley first (whichever sits highest and most accessible), then walk it off the remaining pulleys. Inspect both the belt and the pulley grooves as it comes off. Glazed ribs, oil contamination, or polished pulley grooves all tell a story about why the previous belt failed.
Step 4 — Inspect tensioner and idler operation. With the belt off, rotate each idler by hand. It should turn freely with no roughness, no lateral play, and no audible bearing wear. Press the tensioner arm through its range of motion — it should move smoothly with consistent spring resistance and return cleanly to its rest position. Anything less than that is a flag to recommend tensioner replacement at the same visit.
Step 5 — Clean the pulley grooves. Wipe each pulley with a brake-cleaner-damp rag, paying particular attention to the crankshaft pulley which collects the most contamination. Allow the cleaner to flash off before fitting the new belt.
Step 6 — Route the new belt. Following the photograph and the diagram, walk the new belt around the pulley train, leaving the alternator or AC pulley last so there is somewhere to take up the slack when the tensioner is released.
Step 7 — Re-tension and seat the belt. Rotate the tensioner against its spring, slip the belt over the final pulley, and slowly release the tensioner so it takes up tension under spring load — never let it snap back.
Step 8 — Verify rib seating. With the belt in place but the engine off, run a finger along the underside of each pulley to confirm every rib is seated correctly in its groove. A single overhanging rib is a fault that must be corrected before the engine is started.
A disciplined run through these eight steps takes a competent technician roughly fifteen to thirty minutes on most passenger vehicles. The PK belt installation itself is rarely the slowest part of the job — preparation, inspection, and verification are where the value is added.
Common PK Belt Installation Mistakes to Avoid
Even experienced technicians fall into a handful of recurring traps when fitting a serpentine belt. Each of these mistakes is preventable with awareness and a small amount of discipline.
Misreading the routing diagram. Modern engines often have very similar-looking routing across model years that differ only in the position of one idler. Always cross-check the diagram against the specific vehicle’s chassis or engine code rather than relying on visual memory from a similar car.
Letting the tensioner snap back. Releasing the serpentine belt tool quickly so the tensioner springs back hard against the belt looks fast, but it shock-loads the tensioner spring and can damage the internal damping bushing. Always release the tensioner under control.
Skipping the rib-seating check. A belt that is off by one rib on a single pulley will run noisily within a few minutes of the engine starting, shed material along the offending edge, and fail prematurely. Two minutes of post-fitment inspection prevents this entirely.
Reusing the old belt “just for the test drive.” A belt that has been removed from a hot engine and refitted has been worked beyond its design contour. Refitting it, even briefly, accelerates the damage. If a fresh belt is in the bay, fit the fresh belt.
Ignoring oil and coolant contamination. A belt fitted to pulleys still coated in residual oil from a leaking front seal will slip, glaze, and squeal within days. The source of any visible contamination has to be addressed before the new belt is fitted, not after.
Fitting the wrong belt code. A 6PK1850 in place of a 6PK1860 introduces enough slack that the tensioner cannot fully compensate. Always cross-check the printed belt code against the catalogue listing for the specific vehicle, not against the code on the previous belt — which may itself have been wrong from a previous repair.
Mixing up stretch-fit and tensioned belts. Some recent European platforms use stretch-fit belts that require a special installation tool and have no tensioner. Fitting a tensioned belt where a stretch-fit was specified, or vice versa, is a routing system mismatch that no amount of careful PK belt installation technique will rescue.
Reusing the tensioner on a high-mileage engine. On vehicles with more than 120,000 km of accumulated mileage, the tensioner and any plastic idler pulleys have typically reached the end of their useful service life even if they still feel acceptable at inspection. Replacing the belt without replacing the tensioner on a high-mileage engine often produces a comeback within six to twelve months, because the marginal tensioner that the old belt had adapted to no longer holds the fresh belt at the correct tension. Quoting tensioner and idler replacement as part of the same job is the right conversation to have, and the customer will usually agree once the underlying logic is explained.
Not warming the belt before final tensioning. A belt that has been stored in an air-conditioned warehouse can be measurably stiffer than its operating-temperature dimension. Letting the belt sit in the engine bay for a few minutes before final fitment, or briefly working it by hand, makes the tensioner travel sit at a more natural mid-range position once the engine has reached temperature.
Every one of these traps is well known to senior technicians and entirely solvable through habit. A workshop that documents these as part of its standard belt service checklist sees its first-time-right rate climb sharply within a single quarter.
After-Care and Verification: Confirming the Job
The job is not finished when the tensioner takes up the new belt. It is finished after the verification cycle, and skipping the verification cycle is where workshops lose money on warranty comebacks.
Initial run-in. Start the engine with the bonnet open and the bay quiet. Listen for any chirp, squeal, or rhythmic noise from the belt or the accessory drive. A correctly installed belt on clean pulleys is essentially silent at idle.
Visual rib alignment. With the engine running at idle, observe the belt edges from above. Both edges should track in line with the pulley flanges. Any walking, fluttering, or visible lateral movement indicates a routing or alignment problem that must be diagnosed before the vehicle leaves the bay.
AC compressor engagement test. Engage the air conditioning at idle. The AC compressor pulls a significant load through the belt and is the most common point at which a marginal fitment reveals itself. Listen for squeal, slip, or any change in belt note. UAE workshops should treat the AC engagement check as non-optional given how much of the year the AC will run under maximum load.
Short road test. A short drive through the gear range, with the AC on, surfaces any tension or alignment issue that has not appeared at idle. Five to ten minutes is usually sufficient.
Document the job. Record the belt code fitted, the installation date, and the vehicle odometer reading in the workshop management system. This data builds the workshop’s own institutional knowledge of which belts are running well on which platforms — knowledge that is directly useful when the same vehicle returns for its next service.
A belt fitment that has been verified in this way is a job the workshop can stand behind. The technician knows the job is right, and the customer leaves the bay with confidence that the next twelve months will be uneventful.
Sourcing Quality PK Belts for Every Job
The quality of the belt itself is the foundation on which good PK belt installation rests. A perfectly fitted belt made from a substandard compound will still fail prematurely under UAE operating conditions, and any workshop that has experienced a midsummer comeback understands the cost of a cheap belt very clearly.
Key supplier criteria for any workshop building a reliable belt supply chain in the UAE include:
- Compound suitability for Gulf conditions. EPDM-jacketed belts significantly outperform older neoprene-jacketed belts in heat resistance, flex fatigue life, and resistance to crack initiation at high ambient temperatures. Any belt destined for a UAE engine bay should be on an EPDM specification.
- Range depth. A supplier who carries 300 belt codes locally serves a workshop less reliably than one who carries 3,000. Range depth determines whether the workshop can complete a belt job today or has to ask the customer to come back next week.
- Local UAE stock. A belt sitting on a Dubai shelf is available this afternoon. A belt sitting on a sea freight container is available in six weeks. These two options have entirely different operational implications.
- Cross-reference support. Translating an OEM part number into the correct standard PK code is something a good supplier handles routinely. Workshops should not have to do this work themselves on every job.
- Trade pricing for volume buyers. Manufacturer-direct purchasing through locally based UAE producers typically delivers better pricing than multi-tier import distribution chains, while keeping quality accountability in the same time zone as the customer.
For workshops that run frequent belt jobs, building a direct supplier relationship with a local UAE manufacturer is one of the highest-leverage moves an operations lead can make. It shortens lead times, removes intermediate margin layers, and concentrates technical support — including cross-reference assistance and warranty handling — in one accountable supplier rather than three or four.
Universal Rubber Belt Manufacturing supplies the full automotive PK range from a Dubai factory, with comprehensive coverage of the sizes used across the UAE vehicle parc and dedicated trade support for workshops, retailers, and fleet operators. Wider trade enquiries and the catalogue are also available at universalbelt.ae.
A workshop that combines disciplined fitment technique with a reliable local belt supply is a workshop whose belt jobs simply do not come back.
Conclusion
Good PK belt installation is the unglamorous craft that quietly underpins every accessory drive on every modern vehicle in the UAE. The tools are inexpensive, the procedure is teachable, and the gains from doing it well are immediate — fewer comebacks, cleaner customer hand-offs, and a workshop reputation that compounds with every successful service. The single most valuable shift any workshop can make is to treat the install as a structured procedure with preparation, execution, and verification stages, rather than as a quick swap squeezed between bigger jobs. The belts are doing serious work in punishing conditions, and they deserve to be fitted with the same care that goes into any other safety-relevant component on the vehicle.
Universal Rubber Belt Manufacturing produces the full automotive PK range from its Dubai factory and supplies workshops, distributors, and retailers across the UAE and GCC. If you want to source quality belts for every belt job, verify a code, or discuss trade pricing for your business, the sales team is ready to help.